Wednesday, April 10, 2013

X1K Temp Docky on X1000

Today I wanted to take a look at the recently released X1K Temp Docky for the X1000.


It is a program specifically for the AmigaOne X1000 which displays the temperatures in the critical areas on the X1000 motherboard. (Local, CPU, Core 1 and Core 2)

It runs as a docky, which means that it sits in the AmiDock at the bottom of the AmigaOS4.1 workbench screen while running. It is written by Alexandre Balaban and it is available for free download on os4depot.net .

After downloading the archive from OS4Depot, I extracted the archive to the RAM Disk and it appears as below:


When I open the extracted folder, I see the Docky, a AmigaGuide readme and the Setup program to install it - nice and simple, how I like it:


The Readme is in AmigaGuide format, which is a nice touch, and contains everything you need to know about this program except how to put it in the dock. I will show this part later:


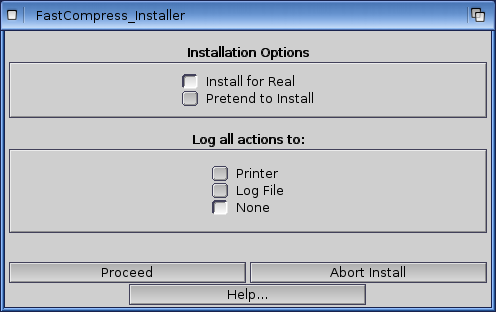
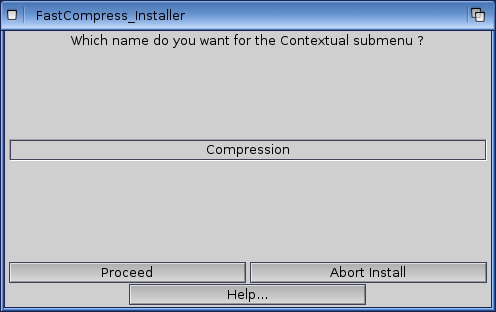
 When I run the setup it is a fairly straight forward installation process, but I show the screens where we have to select things:


After proceeding we have to agree to the license agreement to proceed:


Next we need to select what we want to install. I ticked both Software and Manuals. They both get installed into a default directory, SYS:Utilities/Dockies


Installation complete!


Ok, so now what do we do? As I haven't played with dockies very much, I browsed to the SYS:Utilities/Dockies folder and found the new docky X1KTemp.docky installed in there:


When I try to run the X1KTemp.docky from here I get a very helpful message explaining what I have to do to get it working:


Drag and drop! Excellent! I know you can do this for other programs you want to run from the dock, so I should really have guessed it was the same (slaps head). So I drag and drop the docky onto AmiDock and hey presto -  Temperature monitoring is now active!


If you right click on the X1Temp.docky in the SYS:Utilities/Dockies folder and select Information you can modify some of the attributes to change colours, fonts, Fahrenheit or Celcius display amongst others:


 The Readme.guide in the same folder has all the tool types you can change explained well if you want to have a play with them, as shown below:


X1K Temp Docky is a simple program, installs easily and does exactly what it says it does!

To be honest I wasn't aware that there was 4 temperature sensors in the X1000, and now thanks to this docky I can monitor the X1000 and shut it down when it gets very hot, as it definitely does here in Australia!


Saturday, March 23, 2013

The Legend of Edgar on X1000

Today I wanted to take a look at an interesting game called The Legend of Edgar for AmigaOS4 on the X1000.


This game is released by Parallel Realities, and a recently released updated version is available for free download on www.os4depot.net .

It is a platform game, but unlike many platform games it has a lot to it - it has a number of challenges to overcome, keys and items to find, objects and people to interact with, tasks to do to progress into the game and some thinking involved! Let's dive in!

After downloading and extracting the game from OS4Depot, you will see the following folder contents:


The readme explains a little more about the game, but no tricky things to install to get started with the game:


Also, the game does not appear to need Warp3D, so it can run on the X1000 without the Dual Display Radeon 9250 setup I have for Warp3D games, and supports running in full screen or window modes. (this can be set in the options menu in the game itself)

After running the game, you are presented with the main screen and then after pressing a key, the main menu appears, with a few options to choose from (as shown below):


I decided to dive into the tutorial first, and I am very glad I did so, as it explains the keyboard commands and how to play the game.

It is highly recommended to walk through the tutorial, from which I show some screenshots below:


Having walked through the tutorial, I was now ready to tackle the main game. To start with the game leads you through the story of your dad being kidnapped by a sorcerer and needing to rescue him:


You then interact with characters, which provide you tasks you need to complete in order to receive a weapon, key or other objects needed to move forward through the game. Initially the first character I spoke with required me to feed the chickens and trap 3 of them in a cage, plus cut some wood from a nearby forest to receive a sword. So I got underway:


You can move up and down on platforms which expose other characters, which I found quickly, and found more tasks to do in a mine. But for now I focused on the first task and found my way to the forest...


At this point where there is the black ball hovering I can save the game to come back later if I am killed later on, which is nice as it does take a while to get through the game's many tests. As I proceeded, you can view the inventory to see what you have collected so far, and to change the active weapon you are using:


You need to find keys along the way to open doors to unexplored areas, which often involves doubling back on yourself. As in the example below, I have found the axe needed to cut the wood in the forest deep in the forest, dodging bats, spiders and other creatures! I then have to backtrack to cut the trees I passed in order to find the axe!


Having cut the trees needed, I went back to the first person I talked to, and he then gave me a sword:


So next I explored and found the mine entrance - I need to collect 10 pieces of coal here and return it to the second person I spoke with:


I kept exploring through the mine for a while, finding keys and other items, but the number of enemies and falling boulders took my remaining life energy and it was game over:


I am keen to play more of this game, as there is a lot to it. The graphics are simple, but work well for the type of game it is. The maps are quite large without being confusing to navigate, and the game runs well (as expected) on the X1000.

The music is nice, and changes often enough to prevent it becoming boring.

I highly recommend giving this game a go!

New Backgrounds for X1000

Today DJ Nick released some new HD Wallpaper backgrounds for AmigaOS4.

Given it has been a while since I have changed my workbench background, it was a good opportunity
to do so today!

I have included some workbench screen grabs using two of the new backgrounds on my X1000 (click to expand):


You can get these at http://www.amiga-look.org/contributions/djnick?page=1

I am glad DJ Nick continues to release new backgrounds, as they keep the look of the X1000 fresh!

Please keep them coming!

Tuesday, February 26, 2013

FastCompress 1.4 on X1000

Today I wanted to take a look at FastCompress 1.4, a recently released utility for AmigaOS4.


FastCompress is a utility written by Guillaume 'zzd10h' Boesel and is available for free on www.os4depot.net . The utility allows you to right click on a folder, file (or multiple of each) and then select to compress the selection to a LHA, LZX, ZIP or 7ZIP compressed file, automatically named.

This right click to compress to ZIP functionality is very familiar for Windows owners, but until now was not on AmigaOS4. I previously used a utility called Cranu to do this compression jobs via a GUI but was nowhere near as efficient.

Before you install FastCompress, it is important to install MUI NList.mcc (I already had this installed but it is available to download from OS4Depot.net if you need it).

In addition, Fast Compress also needs a separate piece of software called png_im, which is also available on www.os4depot.net . I didn't have this so I downloaded it! Once downloaded, I extracted the png_im.lha archive to RAM: as below:


I next read the readme, which states I need to copy the png.iconmodule file to LIBS:IconModules/ and reboot:


When I checked the libs: folder from the Shell, I found that (for me anyway) the IconModules folder did not exist. So I created it (makedir LIBS:IconModules), and then copied the file required in the Shell (as below) and rebooted the X1000:


Having done this, I then extracted FastCompress archive I downloaded to RAM: so I could get started installing FastCompress itself:


Inside the extracted FastCompress folder is the installer and ReadMe, which explains how to do the manual installation - although of course I fully intend to use the installer:


So after running the installer, we then walk through the install process for FastCompress. There are a few options to select along the way - so I want to show you what to expect. The first few screens are normal installer screens:


The next screen prompts us for the install location, and default to SYS:Utilities, which is where I installed it:


Then it will ask if you want to install FastLHA, FastLZX, FastZIP and Fast7z. These components are the core of Fastcompress and execute the compression of the files you select. I installed all of them, which is the default option on each screen here:


After that, the installer will ask if you want to integrate the tools into the Right Mouse Button Contextual menu (ie. the menu that appears when you right click on something on AmigaOS4. I answered Yes:


The next question asked by the installer appears to be added if this is an upgrade installation. I answered No here. BTW if you answer Yes it will ask you to remove the lines added into a config file to allow the FastCompress right mouse click to work before you can proceed:


Next it will prompt for what you want the right click Menu option to be called. I aceepted the default name Compression:


Now the installer goes awat any modifies the ENVARC:ContextMenus.cfg file to add in the right click menu options for FastCompress:


The installer then asks if you want to verify the changes made, which I did:


When this config file window is closed, the installer continues and prompts to reboot the X1000 now, which I said was ok to proceed:


After the reboot, we are ready to try it out. First I select Notepad in the Utilities folder, right clicked and select Compression > FastLHA option, as below:


Next I now get a progress window showing the compression progress in FastLHA, the filename title, time to complete, and other details relating to the compression task:


As you can see it took one second to complete. I closed this progress window since the job was completed (there is an option to automatically close this window in the tooltypes of FastLHA).

Looking back in the Utilities folder I now have the LHA file just created:


I then opened the LHA archive and extracted to RAM to run and confirm the file works fine - success!


I then tested other files with FastZIP and Fast7z options on the right click menu, also successful (as below):


So next I tried something a lot bigger, with folders and multiple PDF files inside:


I then extracted the pdf's to RAM and checked they worked ok - all good!


FastCompress is free, fast, works as advertised and is recommended for AmigaOS4 users.

Guillaume has also released some other utilities on OS4depot recently and I will be trying them out too shortly!